Showing posts with label tools. Show all posts

Monday, November 2, 2015

Not Just Killer Tables!

I took on a huge project, at such a bad time.. I half regret the choice, to build it.. But, the outcome is is pretty fantastic!

Probably the toughest build yet, and definitely the longest.. Not because of design or lack of skill.. It's just that I had people coming to view the house.. Documents to sign.. Open house.. Ugh. It was just bad timing. My own fault. And had I known.. I would have waited, until after the move.

That being said.. I know the client, and wanted to get this big bastard done! She'll love it. Assuming it fits in her truck.. I so, hope it fits..


This exact model is certainly not available, by the way.. It's definitely one of a kind.. However.. That being said. I will most likely have a similar model, once I am back up and running.. Maybe a bench / coat rack.. With storage.. Maybe.. I don't know yet!

Did I mention the house is sold?!? Sell with Keller Williams. They are very dedicated and knowledgeable! Not your average slithering, shifty Realtor.

Thanks Michelle and Rob! <3

Monday, October 19, 2015

Escape from London

My time in this city is quickly reaching it's joyous expiration date. Killer Tables will inevitably be packed up, and buggered off, to another location. Good times!

Will I miss London? I dunno.. I met some pretty awesome people here.. But, there's certainly no shortage of weirdos, either.. I only hope the normal, human folks don't mind a quick burn down the highway, to visit the new shop. <3

Down to business:

My absolute, very last custom order is out the door! From here on, there will only be "inventory" coffee tables. That's 4'x22"x17"H  standard. There's just no way to guarantee the pickup location of a custom order, at this time.. And I am going to avoid that argument, like the bleeding plague.

Sorry, if that's a bit of a bummer.. It's just how things is. We'll inevitably get over this sadness and move on with our lives, though. I promise. Things will turn around for you. They will.

Keep an eye on the blog, for updates on the workshop location though. I'll keep you all posted!


Sunday, August 16, 2015

Getting Started

Okay.. I know what you're thinking.. How the heck does an author land himself a successful furniture "business." Going from writing, to woodworking? That doesn't make any damn sense at all!

And you're right. I never would have imagined myself as a carpenter.. Although, my father would be presently surprised, I am sure. As well as his father. Both of whom were fully certified carpenters. With their fancy book learned trade papers and all! Not me though. I can't stand the abhorrent taste of tuition, on my tongue. It would ruin the whole experience, for me. Entirely!

So, I skipped school.. Skipped the loans and debt.. And now? I am making a name for myself.. My popularity is growing, due to my low cost, high end looking furniture. I mean.. There's no real difference, aside from how the builder values his time. I am just being more realistic.

So what kind of investment did I make? Roughly? Well, I needed to make straight cuts. So I bought a $20 mitre box, from home Depot.. A couple of nails.. A hammer and about $20 worth of lumber. That takes care of the building process. What about stain? A hunk of steel wool and a few cups of vinegar. That's it. The whole thing started with a few bucks and a little patience.

Now I've got a whole plethora of RYOBI tools, and gadgets.. Saws, stains, fans, and filters..

The best advice I can give, for anyone looking to get started?

-It might not work out. So don't get carried away, with buying tools. Start small.

- Don't over estimate your value. Whatever amount of time you put into a project, is Irrelevant to the consumer. Price realistically.

- If a customer doesn't like a piece, made specifically for them. They're either looking for a freebie, or they have far too much free time. Drop them, immediately.

- Some people are just fucked, and should be avoided at all cost...

Monday, July 13, 2015

Keeping busy

I promise. I am not in over my head.. I've got a good amount of order.. It's just, they're not due until August, or later. Not that I am procrastinating! By no means!

I am really enjoying this business of mine. Building fabulous furniture, at a reasonable price, and making people happy! Unless you're my competition. You may not be so happy. Sorry competition people.

Sunday, July 12, 2015

Semi Weekly Hardware Store Visit

As I get older, I feel myself becoming more and more like Hank Hill.. I am not entirely sure how I feel about it.. Though, I am not exactly upset about it. Especially being able to say, "That boy ain't right."

My regular trips to the hardware store and racially appropriate neighbour certainly do nothing, to sway this image.. As long as I don't run out and buy myself a pickup truck, I should be fine.

I met up with a client first, too. So, now I've got a few projects, to keep me busy. A few guaranteed sales.. I do love all of the compliments and the "I want" 's. I'd love to build you all furniture. But, I need to function, as a business. So, unfortunately, I need a deposit. Just to guarantee that I am making furniture, for a reason.

Sunday, July 5, 2015

Dragon house!


Here's and oldie, but a goodie!
This is a project that I had done a while ago. Enjoy!
Before


It started with an armoire, destined for the landfill. It seemed to have run its course. An obsolete cabinet, designed for an obsolete style of television. Game over, you big, ugly waste of space..

But wait.. Recycle!
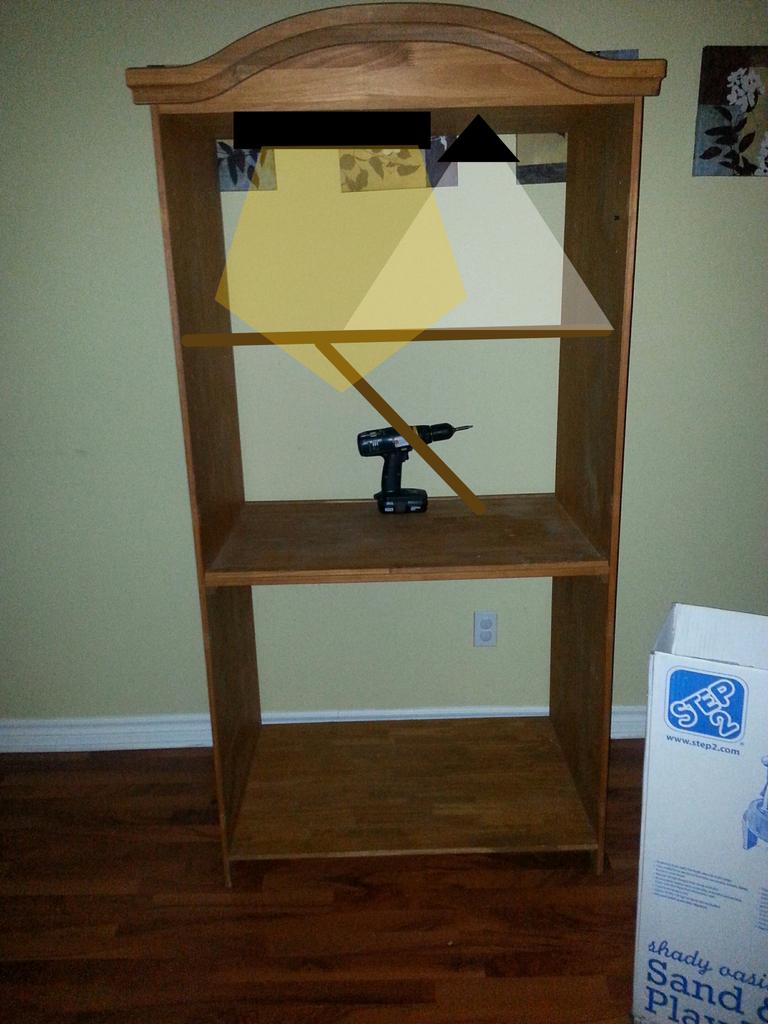
After drawing out some horrible plans, I immediately gave up on planning. The only way I would get this done, is by recklessly diving in. No guides, or foolish diagrams to hold me back. It's DIY anarchy!

Then my wife stepped in and told me what color to use.. Which started me off in a specific direction. So, it's off to the hardware store! And then Walmart.. Then back to the hardware store!

This is mostly a Home Depot project. Although, I did end up getting the light fixture and Mod Podge from Walmart. But, only by chance. Had I found a sealer and cheap light at Home Depot, I would have shopped there exclusively, for this project.

That being said.. I have since found a better, cheaper solution to Mod Podge. Stocked at Home
Depot, is Minwax Polycrylic non-toxic, water based sealant. Knowing this, I would definitely suggest substituting the Mod Podge, for Minwax. It's reptile safe, once dry.. So, give it a few days.

Materials used:
Free, donated, or already owned.
Shitty armoire
Stone basking tile
Dome basking light
Dragon

Purchased for project
Stone flooring - $ Home Depot
Paint - $27 Home Depot
2 paint brushes - $2 each
Mod Podge - $30 Walmart
Plexiglas - $32 Home Depot
Sliding track - $3 Home Depot
Light fixture - $20 Walmart
2x2 lumber - $2 / 8 feet Home Depot

Tools used
Measuring tape
Drill and driver bits
Ryobi one+ drill
Ryobi one+ fan
Ryobi one+ circular saw
Ryobi one+ spotlight (painting at night)
Ryobi one+ shop vac
Yeah, I have a thing for Ryobi tools..

Step one, was to rip the bastard apart and set everything aside. Most of the painting was done inside, because of the armoire's weight. And thankfully, this acrylic paint didn't give off any weird fumes or toxins. It wasn't ideal, but it worked.

Although the paint dried surprisingly fast, I still gave it a day, before applying the Mod Podge. This stuff is messy, expensive, and smells like a kindergarten class, during craft time. I really wish I had known about the Minwax sealer, prior to this step.. But, that's just bad luck, I guess.

I used a tub and a half of the horrible Mod Podge, which worked out to about 3 coats. 4 along the sides, where I felt the dragon may regularly brush against. Each coat was left for an hour or two, drying with the aid of a couple fans.

Once the miserable process of sealing was finally out of the way, it was time to mount the lights! The strip light was a cinch. I simply screwed it at the back of the top shelf, dead center. Nothing fancy, here. But the dome light isn't made for this kind of enclosure.

There was a lot of silly attempts, to hang the light, without drilling a hole.. But, in the end, I used the little clamps, that come with these types of fixtures. Well, half of the clamp.. Instead of fixing the hardware to the actual clamp, I tightened it onto a long bolt. The bolt was tightly fit into a hole, drilled near the strip light. Then, for added "No fally" protection, I applied a nut, onto the end. That thing ain't goin' nowhere!.. Excuse my double negative..

Aside from painting the doors, I didn't do anything to them.. Just screwed them back in place.. Originally, I was going to cut windows into the door. But, instead, i left them solid. That way, if I want to hide the dragon, from prying eyes.. I can easily close him off, from the world.
Which leads us to the sliding door!

I had some idea of how I was going to do this. But, not really. I knew that I was going to have two sliding Plexiglas doors.. The rest was a little bit of walking around Home Depot, looking for anything useful.

Eventually I spotted these plastic things, bending high above me. I still have absolutely no idea, what they are.. But they only cost $3, for a strip, measuring 8 feet. It's solid enough to hold the doors, and easy to work with. I used a hand saw, however. I felt that the circular saw may produce some level of shrapnel danger.

The bottom track is held to the main flooring, of the unit, with Mod Podge. It's staying there, pretty solid, for now. Though, it may need added support at some time, in the future. The top of the sliding doors is a a length of 2x2, cut to fit the armoire. Once painted and sealed, I used a few nails to hold the track in place.

The 2x2 itself, is held in place by a couple of thick screws. I drilled the holes first, using slightly larger drill bits on the armoire. This leaves the board sturdy, in place, yet it can still be twisted in place. This is important, because not only are my doors a bit big. But, at some point, I'll definitely want to remove them, for cleaning. This technique makes it much easier than taking the whole thing apart.


Thursday, July 2, 2015

Something new! Newish..

Well. This table is a bit different. I had some bits of this and that lying around.. And this is what I came up with!

Let's call him; Frankentable